

A beginners guide to photographing your garden
/A really satisfying part of my gardening adventure has been documenting the progress as I go. Looking back at photos from my first-year planting, I can immediately remember my thrill of those humble petunias and cosmos blooming, while also feeling pretty amazed at the garden in comparison to now. My backlog of images is a lovely reminder of just how far this obsession has taken me!
My love of photography is very much buoyed by having a garden and, as my skills at growing have increased, so has my passion for getting creative with the camera. Free of any expectations that a professional photographer might be compelled to meet, the quiet time spent snapping my flowers and beds has become a creative hobby in which I revel in experimentation.
This regular documentation has also aided my gardening knowledge and connection to the life cycles happening in my own backyard. Not only has every year seen a vast transformation in my garden as a whole, but each passing season has also offered visual treats to be collected and remembered too.
When planning, I can easily refer back to my library of images to gain a better understanding of how much light an area receives, vital for my planting combinations. I can also compare the growth of trees and the noticeable improvement in plants that I have moved to better positions. It is very satisfying to have these visual references at hand.
Whether you prefer to reach for your camera, phone, or tablet, there are some basic tips that I use to help me photograph my garden’s magic in reflection of how it feels at the time. My urge has always been to capture atmosphere and a sense of place beyond a simple, straight-up snapshot. There is so much fun to be had with this!
Photograph at the ends of the day.
The softness and lower angle of the sun in the morning and late afternoon provides a glow to the garden that invites me to use this light to my advantage. I like to point my lens towards it, using it to backlight specific plants or beds. I enjoy moving my camera around to allow shafts or dots of light into the frame without completely washing out the photo. I love nothing more than a plant specimen traced in golden lines from the sun pushing through behind it.

Pointing my camera into the fresh dawn light at Fisherman’s Bay garden.
More images here.

Backlight echinacea at dawn. Finding the magic in the moment.

Light edged geum at dusk in my garden.
Find your focus
Before you snap your image, first be sure that your device is focused on the area you want to highlight. On a camera, using autofocus, this will often be found by training and adjusting a green square to lock onto your subject with a half-press of the button. On a phone or tablet, you can tap the subject on your screen to pull it into focus. If taking a wider shot of a garden bed tap or select a spot in its midst and take a few shots of it to be sure you’ll have one that works.
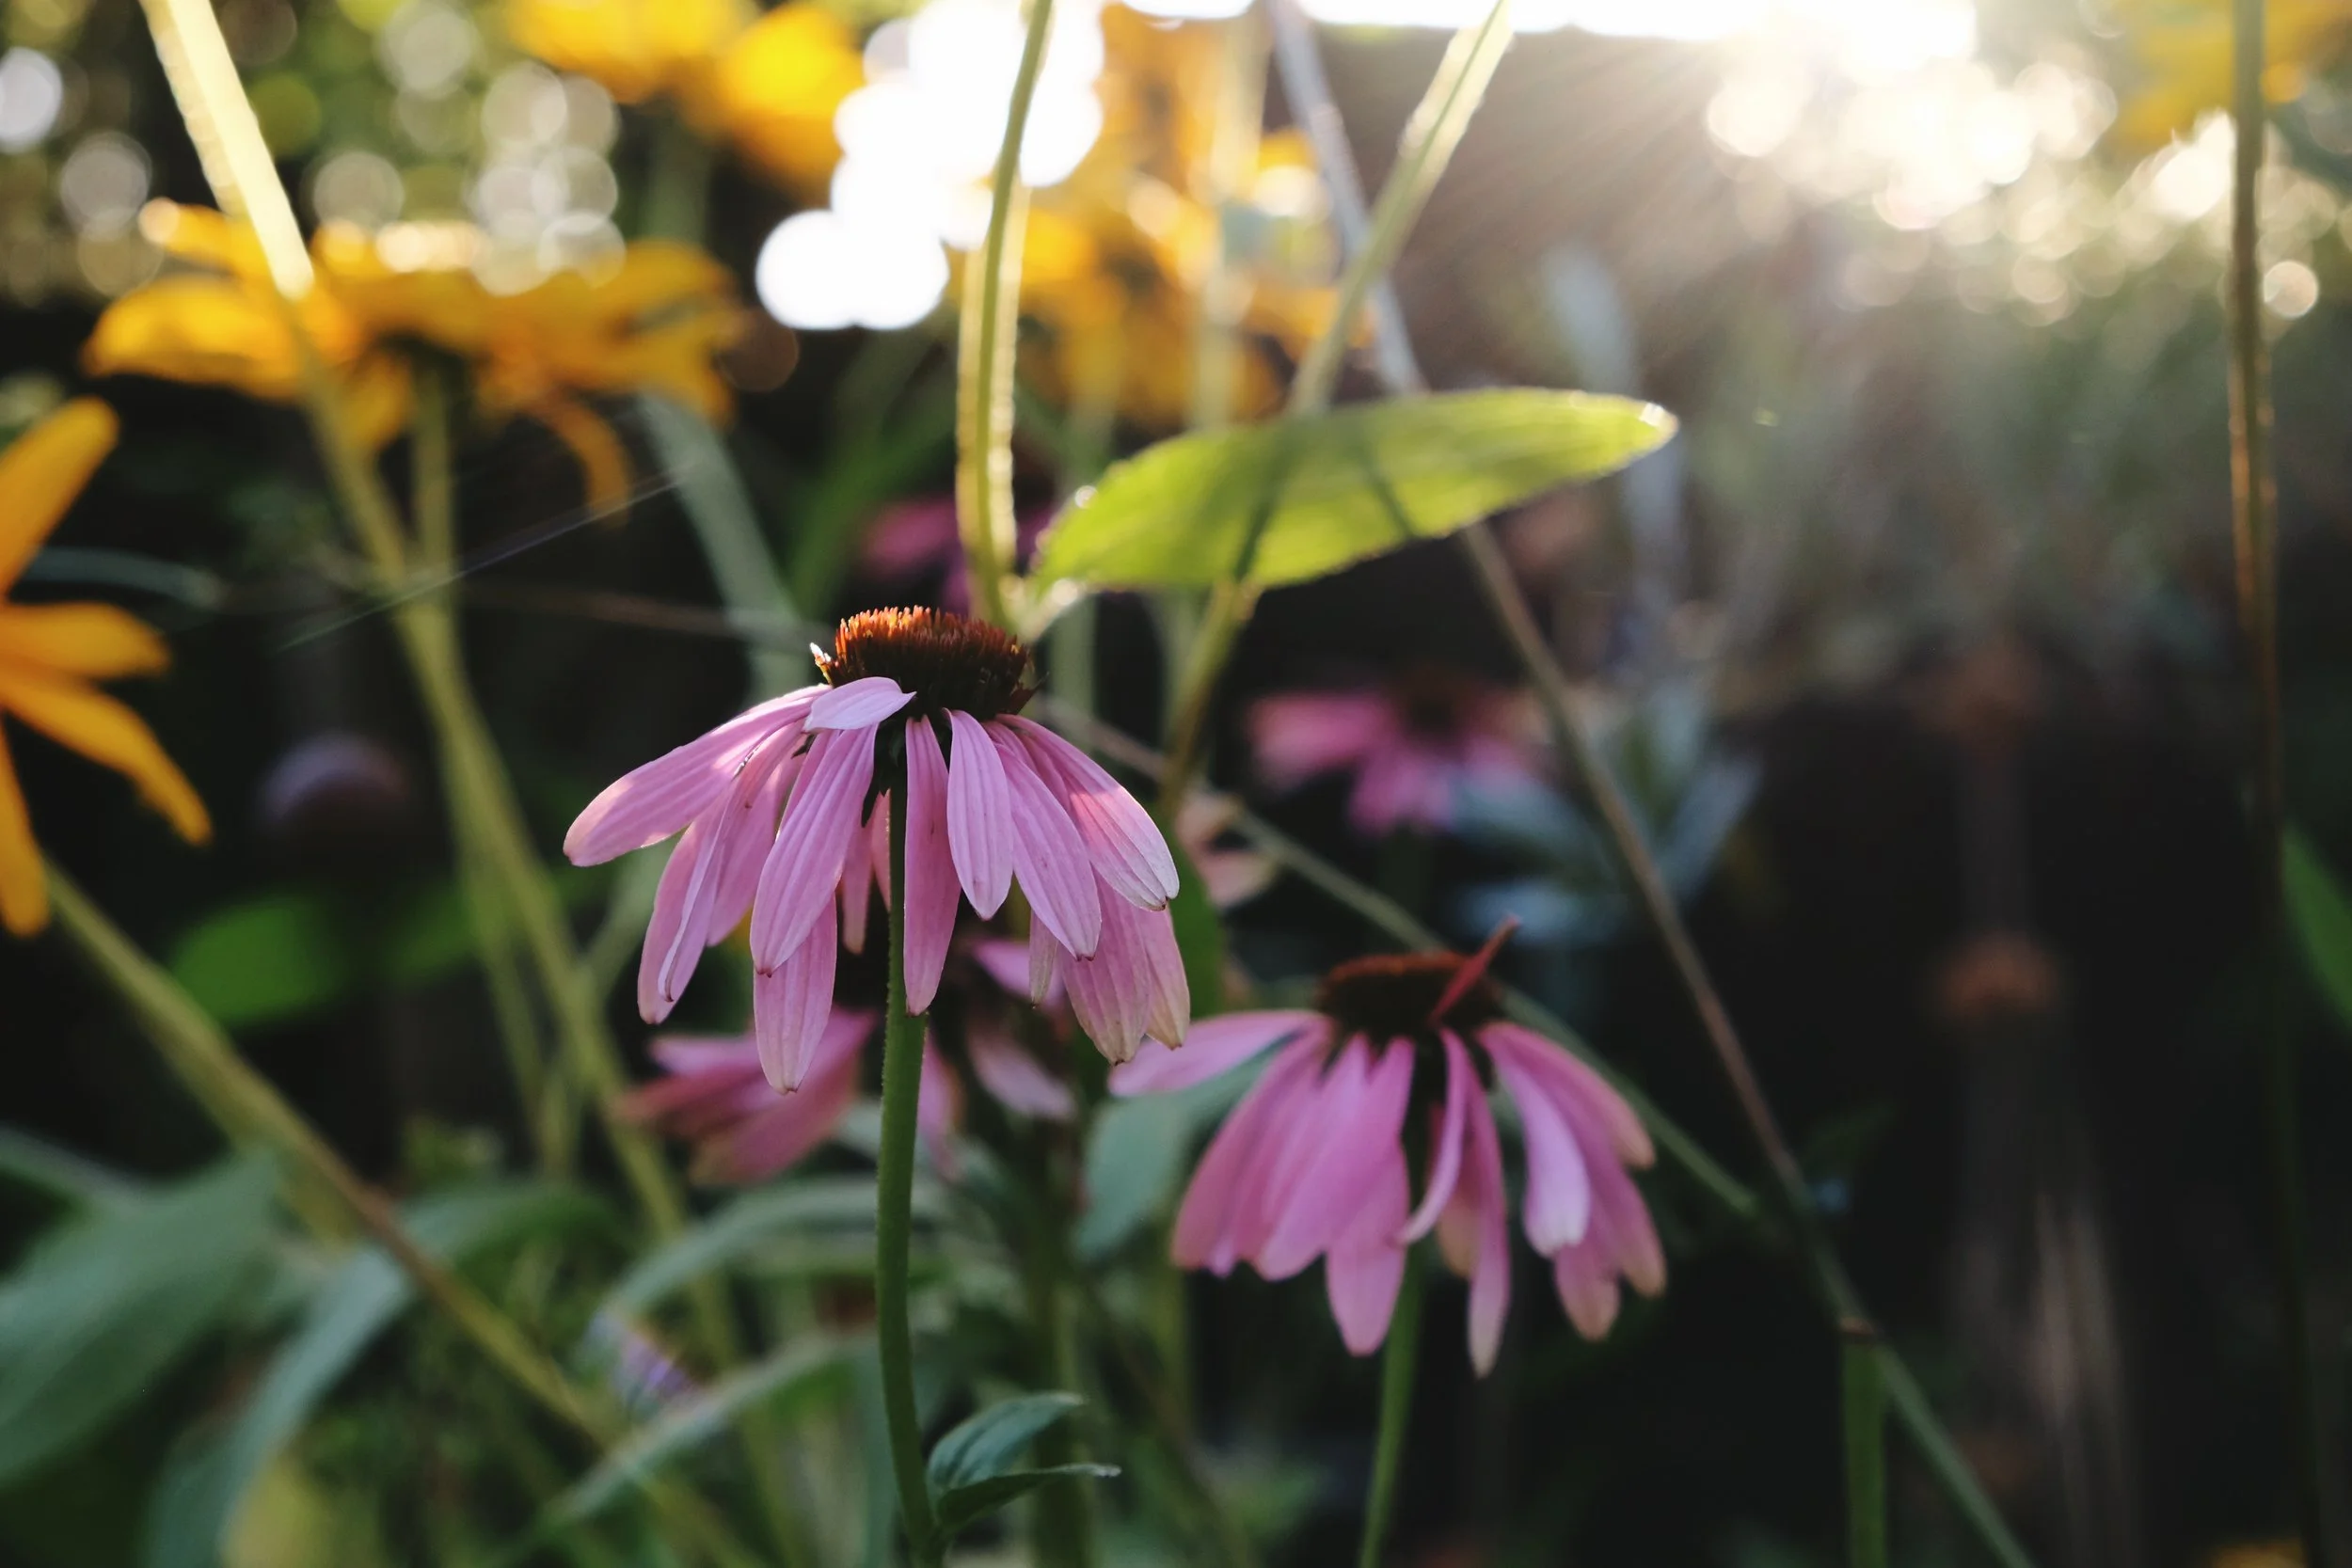
Finding focus on the echinacea creates a shallow depth of field with a lovely effect.

Pushing my focus past other plants to the echinacea within the bed pulls you into the image.
Change your point of view
Extend yourself from just photographing at standing height and get exploring your garden from all angles. I find myself balancing on the edges of my raised beds to shoot from above, dropping a knee to look “through and up” plants, and often wading into beds to find a different aspect from within their midst. I even prefer it when out-of-focus greenery cuts through a shot, feeling that it pulls me further into the final image.
Get up close and personal with your plants, find your focus and be amazed at the delicious results when your device automatically reduces the depth of field. I encourage those with phones to explore the portrait mode option for this too.

Photographing the wonderful shapes of this bed at The Blue House by taking the image ‘across’ it rather than from the front.

Diving into the garden I shoot “past” the leaves of a tree to capture the beauty of The Blue House garden at dusk. I’m prone to some pretty stuff creeping in the edges of an image, although it might be deemed a cheap trick to pro photographers. Who cares!
Stooping to ground level to capture Fisherman’s Bay garden at dawn.
More here.
Use your legs to zoom
If you are using a phone or tablet, I would suggest you resist using your fingers to zoom and instead take progressive photos as you physically move closer to your subject. Even though technology has improved in leaps and bounds, a “zoomed in” image is never as crisp, with this best done only using a camera.

A crop of a wider gorgeous bed at Robyn Kilty’s cottage. I used by camera to zoom. If I had used my phone I would have walked closer to achieve the same composition.

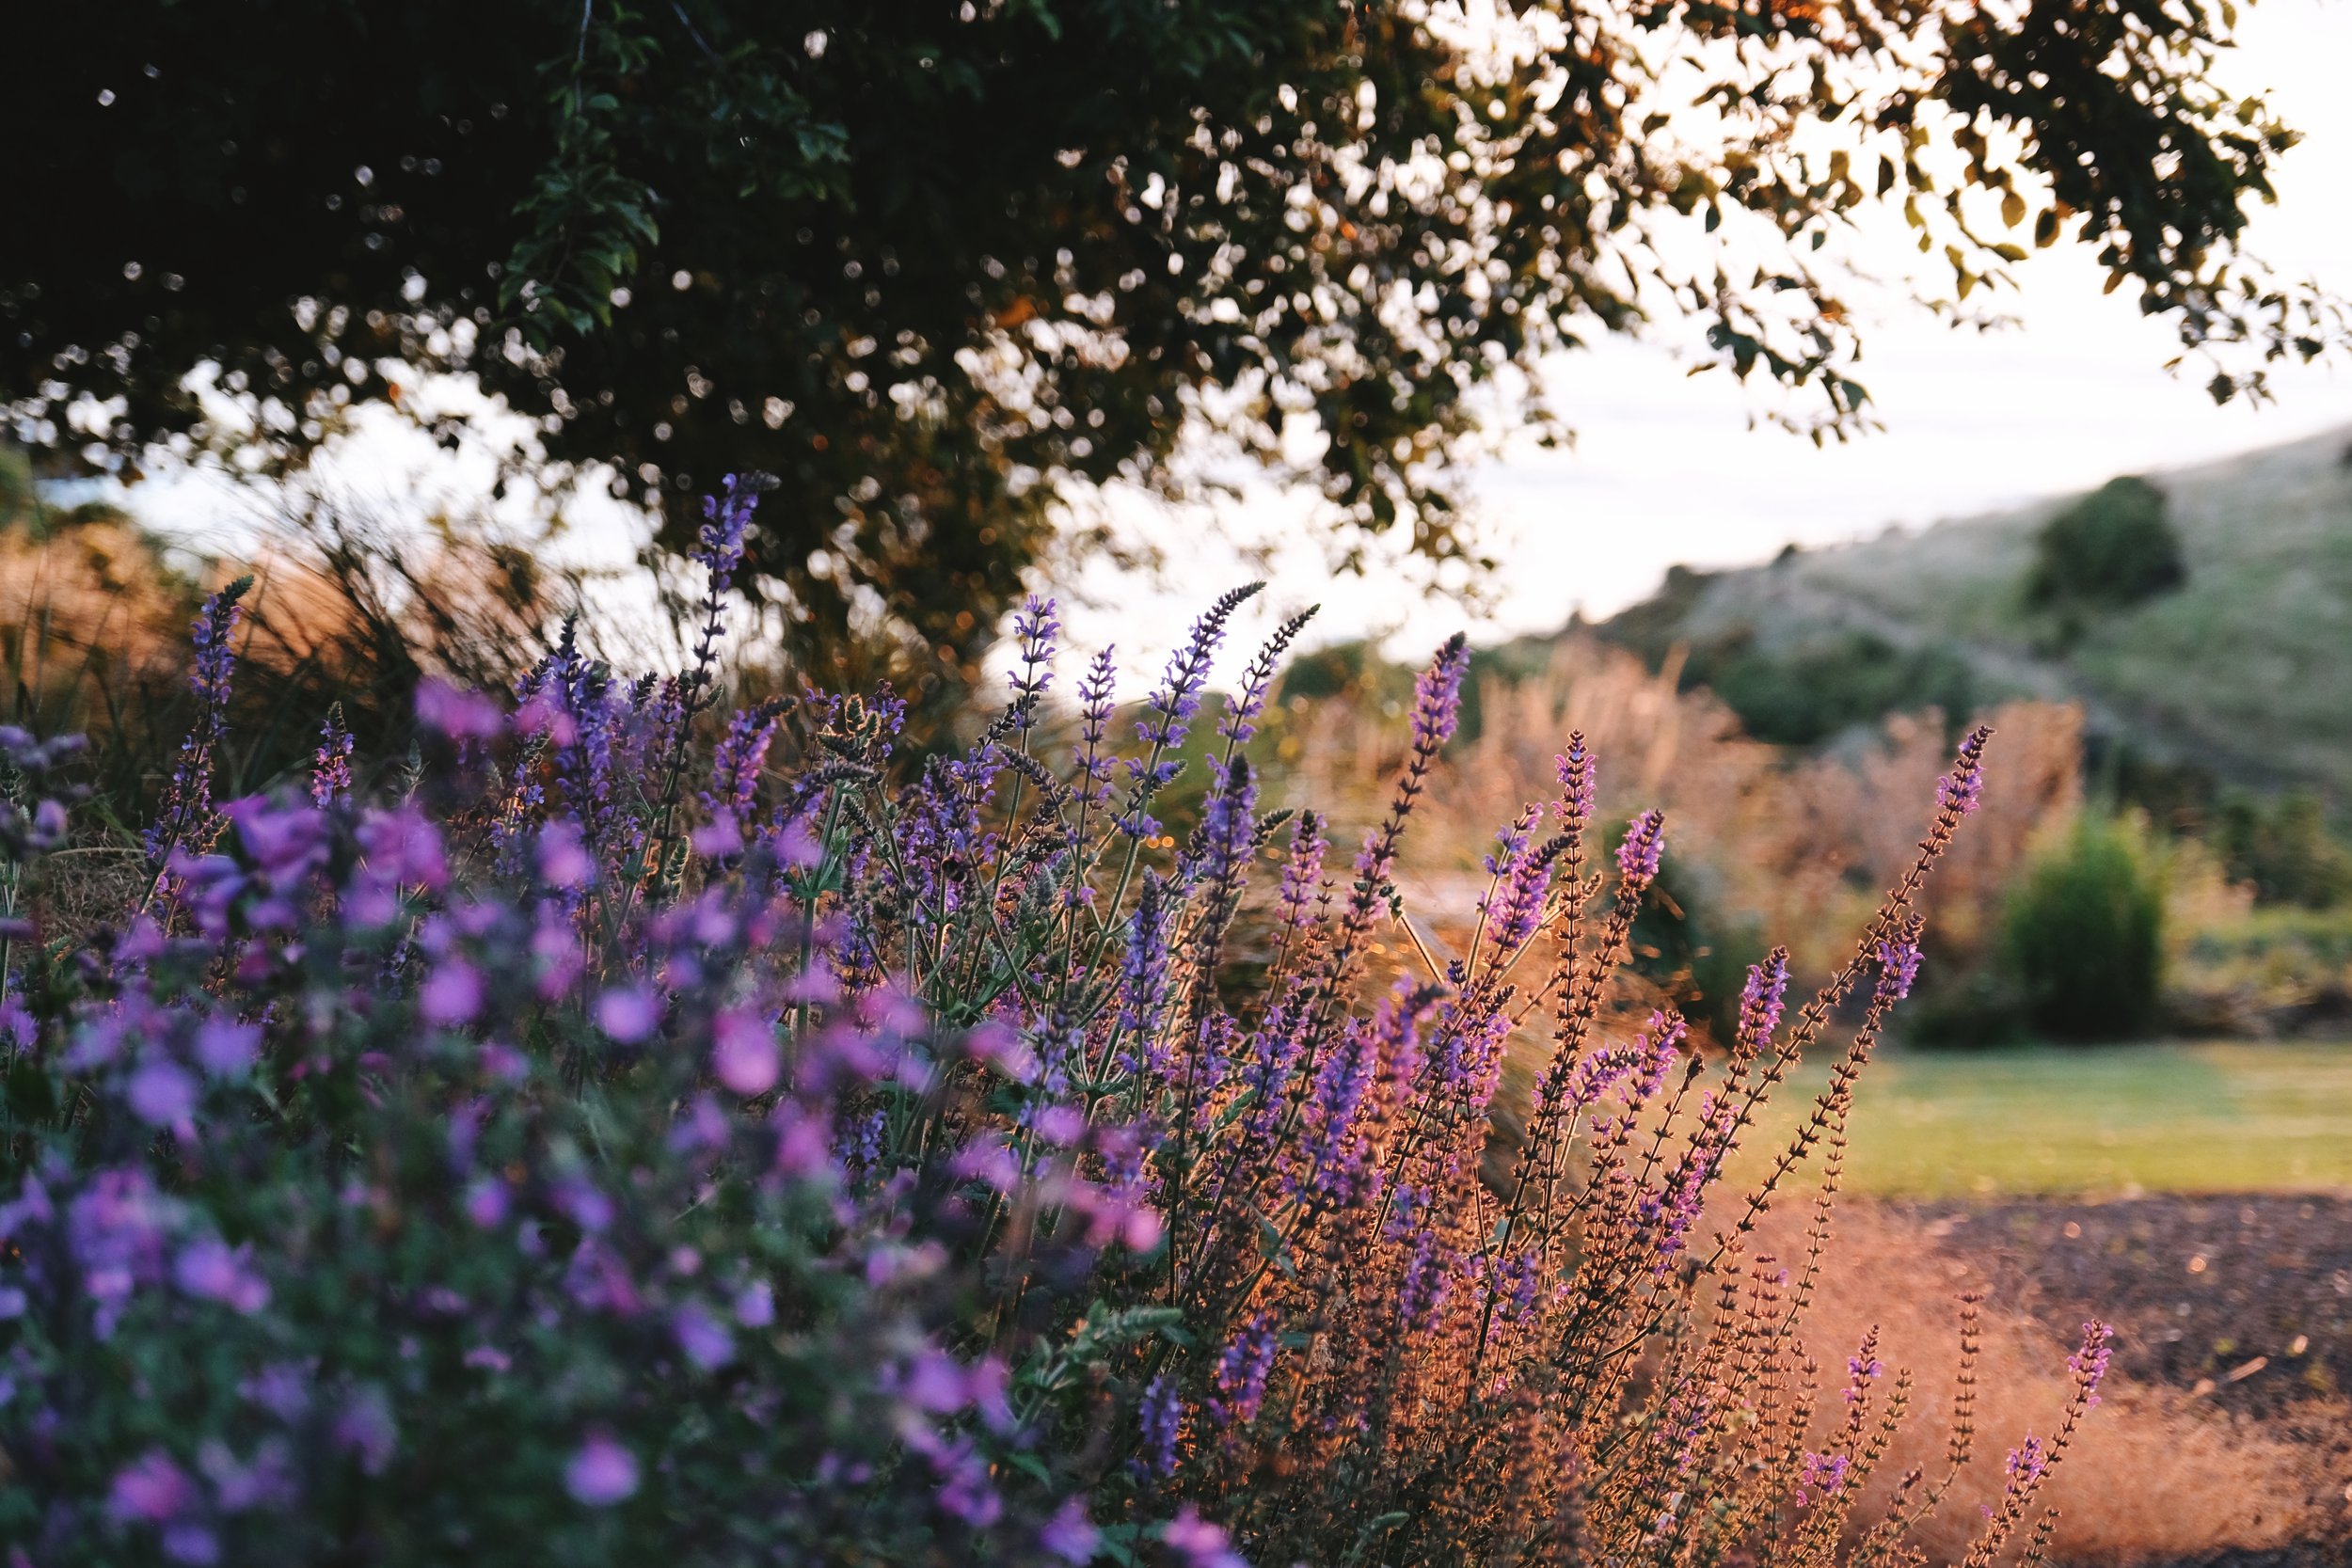
Close up of self-seeded Verbena bonariensis in my garden.

Pushing my camera toward my crop of rudbeckia and helenium, allowing the focus to capture its points at will.
Look for your lines
One of the easiest ways to improve your photo taking is by allowing time to ensure any hard line is level. This might be a fence, the horizon, or raised planter running through the background of your frame. I consider this too with vertical lines like doorways or verandah posts, angling my camera and body forward/back, up or down until it runs nicely parallel to the screen. If I find that I haven’t got it right when reviewing my images later, I use my phone’s inbuilt editing software (or an editing app) to adjust the tilt and resave it.

It takes a few goes sometimes to get your camera at the right angle for horizontal and vertical lines to be plumb.

Vertical lines of our studio give order to this image.

Here I played around to keep the vertical and horizontal lines of the doorway square to my camera.
Consider your composition
If we never stopped to think about our shot, it would only be natural to place a subject in the middle of the frame. However, playing around with moving it off centre can often make for a more visually appealing result!
When composing your shot, mentally break your screen into thirds, both horizontally and vertically. Aim to place your subject along the lines or at the intersection of each third instead of smack in the centre. It is very helpful to turn on the “grid” option of your phone and camera to assist in getting used to composing using these zones. It will become innate!

The in focus Scabiosa ‘Fama White’ is positioned away from the centre of the image on purpose.

Flaxmere Garden at dawn with the soft sunrise washing across the garden from the left side of the image. I purposefully let the path lead us forward but not from the centre.
More from that shoot here.
This is an expanded version of the article featured in my Stuff ‘Homed’ gardening column for beginners , The Press, Dominion Post and other regional papers on May 12th 2022
All words and images are my own, unless otherwise credited.